提升自我
VMware 提供培训和认证,助您加速进步。
了解更多各位 Spring 粉丝们,大家好!在本系列文章中,我们将介绍 Spring Cloud 与 Google Cloud Platform 的集成,称为 Spring Cloud GCP。Spring Cloud GCP 是 Google 与 Pivotal 共同努力的成果,旨在为 Spring Cloud 开发者在使用 Google Cloud Platform 时提供一流的体验。 Pivotal Cloud Foundry 用户将享受到与 GCP 服务代理更轻松的集成。这些文章是在 Google Cloud 开发者布道师、我的好友 Ray Tsang 的帮助下完成的。您还可以在我们 Google Next 2018 的会议《Bootiful Google Cloud Platform》中看到 Spring Cloud GCP 的演练。谢谢我的朋友!
本系列共有八篇文章。它们分别是:
随着我们将越来越多的应用程序迁移到云端,并引入越来越多的微服务,理解问题所在——以及究竟是哪个问题——变得越来越复杂。分布式追踪解决了这个问题。理论上,分布式追踪是一个简单的任务。对于每一个进入或离开系统的请求……对于系统中的每一个入站或出站请求,如果尚不存在 UUID,则附加一个;如果存在,则传播它。不幸的是,由于请求跨越线程和网络边界,同步或异步地从一个节点移动到另一个节点,这种逻辑既繁琐又难以实现正确。Spring Cloud Sleuth 解决了这个问题,并提供了一个 SPI,后端分布式追踪系统(如 OpenZipkin 和 Google Cloud Stackdriver)可以插入其中。
与所有 GCP API 一样,我们首先必须启用它。
gcloud services enable cloudtrace.googleapis.com
我们将搭建一个简单的 REST API 和一个简单的 REST 客户端,并使用 Spring Cloud GCP Stackdriver 的支持来轻松追踪这些交互。
首先来看我们的简单 REST API。新建一个项目(使用上面的骨架 `pom.xml`),并添加 `org.springframework.boot` : `spring-boot-starter-web` 和 `org.springframework.cloud` : `spring-cloud-gcp-starter-trace`。每当调用 `https://:8080/greeting/{id}}` 时,我们的 REST API(好吧,端点)将返回 "你好,[此处是名字]!"。这是服务的代码:
package com.example.gcp.trace;

import org.springframework.boot.SpringApplication;
import org.springframework.boot.autoconfigure.SpringBootApplication;
import org.springframework.web.bind.annotation.GetMapping;
import org.springframework.web.bind.annotation.PathVariable;
import org.springframework.web.bind.annotation.RestController;

@RestController
@SpringBootApplication
public class TraceServiceApplication {

        @GetMapping("/greeting/{id}")
        String greet(@PathVariable String id) {
                return "greetings, " + id + "!";
        }

        public static void main(String args[]) {
                SpringApplication.run(TraceServiceApplication.class, args);
        }
}
配置可以说更有趣。
src/main/resources/application.properties.
spring.cloud.gcp.trace.enabled=true


spring.sleuth.sampler.probability=1
spring.sleuth.web.skipPattern=(^cleanup.*|.+favicon.*)


server.port=8081


spring.application.name=trace-service
spring.application.name 是我们应用程序的逻辑名称,可用于在追踪树、服务注册中心等中将其与其他应用程序区分开来。客户端在应用程序启动时发出一百个 HTTP 请求。它使用的 RestTemplate 已经通过 Spring Cloud Sleuth 自动配置进行了后处理,以拦截和追踪所有 HTTP 调用。
package com.example.gcp.trace;

import lombok.extern.slf4j.Slf4j;
import org.springframework.boot.SpringApplication;
import org.springframework.boot.autoconfigure.SpringBootApplication;
import org.springframework.boot.context.event.ApplicationReadyEvent;
import org.springframework.cloud.sleuth.annotation.NewSpan;
import org.springframework.context.annotation.Bean;
import org.springframework.context.event.EventListener;
import org.springframework.stereotype.Component;
import org.springframework.web.client.RestTemplate;

import java.util.stream.IntStream;

@Slf4j
@SpringBootApplication
public class TraceClientApplication {

        @Component
        public static class Client {

                private final RestTemplate restTemplate;

                public Client(RestTemplate restTemplate) {
                        this.restTemplate = restTemplate;
                }

                @EventListener(ApplicationReadyEvent.class)
                @NewSpan("client")
                public void before() {
                        IntStream
                            .range(0, 100)
                            .mapToObj(i ->
                                restTemplate
                                    .getForEntity("https://:8081/greeting/{id}", String.class, i)
                                    .getBody())
                            .forEach(response -> log.info("result: " + response));
                }
        }

        @Bean
        RestTemplate restTemplate() {
                return new RestTemplate();
        }

        public static void main(String args[]) {
                SpringApplication.run(TraceClientApplication.class, args);
        }
}
RestTemplate 连接到我们服务的直接用法。如果我们要发送 100 个没有共享父 span 的请求,则不需要 `@NewSpan`。如果我们有 100 个请求从外部到达并命中客户端中的 HTTP 端点,并且该端点随后导致 100 个请求发送到服务,那么我们将拥有一个共享的顶层 span。单个 trace 有多个 span。此节点的配置与服务几乎完全相同。
spring.cloud.gcp.trace.enabled=true

spring.sleuth.sampler.probability=1
spring.sleuth.web.skipPattern=(^cleanup.*|.+favicon.*)

spring.application.name=trace-client

server.port=8080
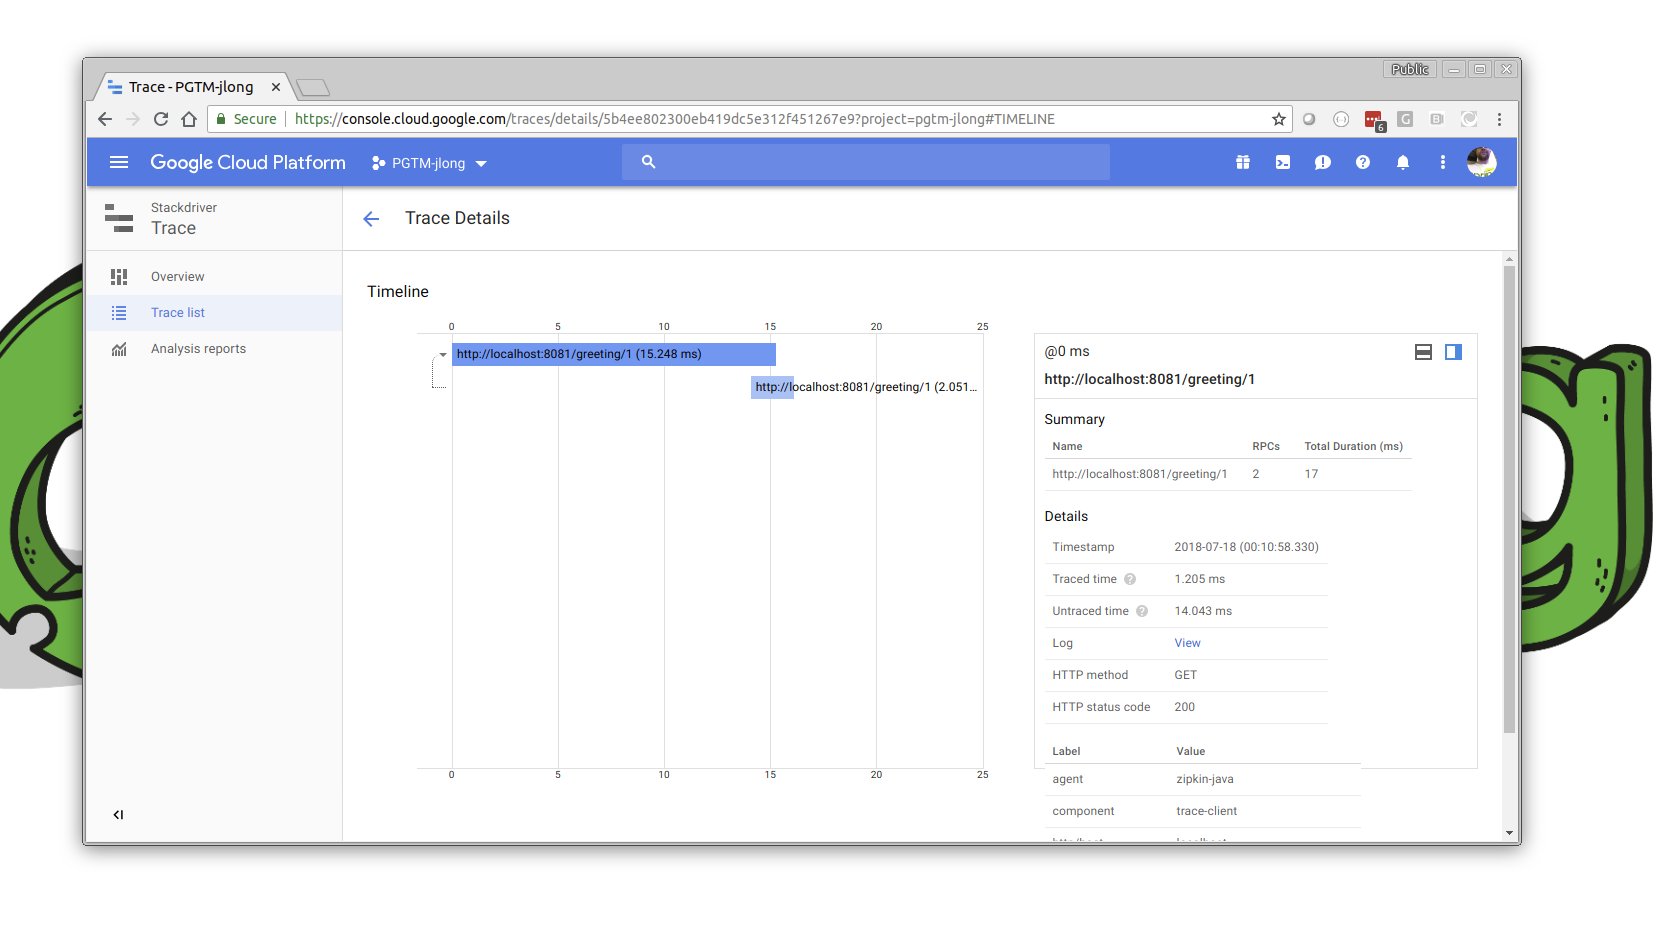
为了实际看到这一点,您需要先启动服务,然后启动客户端,接着前往 Google Cloud 控制台。点击屏幕左侧的“汉堡”菜单,然后点击 STACKDRIVER → 跟踪。在那里,您将能够检查刚刚流经您服务的请求。

Stackdriver 是包括监控、追踪以及——这真是太酷了!——对正在运行的应用程序进行实时调试等一系列服务的总称。您可以轻松地(而且您应该!)在该控制台部分花费更多时间。总之,Google 深知可观测性的重要性,这反映在他们的服务中。